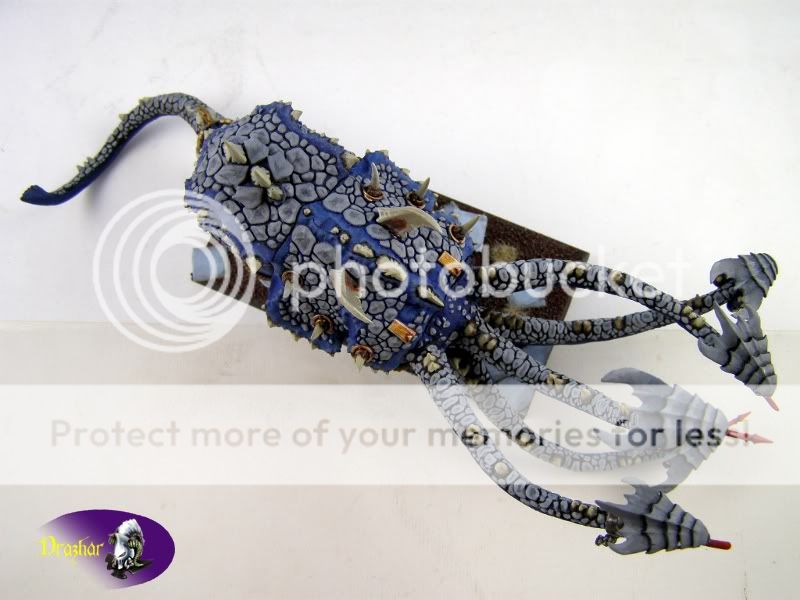
Wednesday, September 21, 2011

The story of two posts on Facebook

Hello again on a fine, warm Wednesday afternoon.

I was going to publish a tutorial on non-standard bases, but I got detoured slightly by a very short exchange of posts on Games Workshop Warsaw's Facebook page. As you may or may not know, The Company recently opened its first outlet in Poland. While I was mildly excited about the fact (since I do my shopping either online or in my FLGS, as I don't live in the capital), I do appreciate the whole situation - finally a very decent market is getting its fair treatment by GW.

The poster on GW Warsaw's behalf stated that they will be releasing, and I quote:

"the first Warhammer Army Book released by Games Workshop in Polish".

This is only partially true, as Army Books and Codices (which is the proper plural of the word "codex") had been previously released in Polish. Only the "by GW" bit is actually the truth. They were enthusiastic about it to the point of euphoria, which to my mind is somewhat an over-hype. But I digress.

As is my right, I voiced my opinion. I did not want to be harsh on someone else's playground (and I don't support any GW publications in my mother tongue at all; I'll discuss it in a future post). I said:

"Is there anyone who does not understand English enough to grasp even the army list and the rules? While I do understand the marketing scheme and even support it in a way, I don't understand the hype".


I think I made myself clear.

GW Warsaw responded as if I, as the Polish saying goes, killed their mothers with a pair of socks. I was shocked at the amount of vitriol unleashed. Not that I got offended, but what I was expecting was a good-natured defense of their product. Instead, I got:

"Whomever prefers the English version over the Polish one is free to purchase it"

This is fine so far. Only valid point to make. However, it is immediately followed by:

"Do not deny customers who prefer the Polish version the right to own one."

"Deny"? "Right to"? This is not the Supreme Court guys.

The strong language is completely unnecessary. On top of that, you just missed the point by the size of an adult rhinox. If anyone can point to any bit where I denied anyone the right to anything, I'll be the first to apologize. I understand you want to sell your product as well as possible, but you will not do it behaving like douchebags. The Polish 'localization' of GW products has its history, and it is not a pretty one. Moreover, I respect your right to do whatever you want with your products. Respect my right to have an opinion and if you like to respond, mind that respect. I am a paying, faithful customer.

Mind you, I'm not butthurt because they didn't like what I wrote. Being a brutally honest person I'm used to people flinging dung at me because they don't like the truth. What I'm concerned about is the whole manner of their response. While I have always firmly opposed the view of GW as the empire of evil, this is not the tone in which to address their customers. This is, sadly, the typical Polish approach to criticism: if you don't like something, you are wrong, and we will diss you because of it.

You can find the relevant thread here (in Polish). My translation above is accurate, as any Pole viewing this will confirm.

See you folks on Saturday.

P.S.: From today, all my musing and trivia posts, basically anything not directly related to my workbench, will be accompanied by the Cigarette Smoking Man. Because he's awesome.

Saturday, September 17, 2011

Night goblins by the hoodful

Remember the bare plastic movement tray from my last post? Wondering what it was for? Well, lookie here:

 Night goblins, forty models game-wise. In reality, there are 35 gobbos, a four-model filler and a big boss, proudly wavin' the Bad Moon Banner. These are of course still to be done...
 ...as are the netters, for example. Or the fanatics. Yes, this unit will be fully pimped and as viable for actual combat as goblins can be.
I will of course be updating you with my progress. Still more to do than I dare to admit. I'm kinda slowed down by the fact I had to order certain bits via Ebay. But they'll get here, and meanwhile i can focus on something else... watch this space.

Wednesday, September 14, 2011

On movement trays and how I make them

Welcome to another Wednesday post. Today, I will be discussing a topic that I feel is a bit understated in the whole industry and blogosphere - the movement trays.


For WFB players, these are a must. There is simply no avoiding the usage of a 'regiment base' - as the trays were known before GW released the multi-model strips and called those Regiment Bases. Moreover, more and more people magnetize their bases and trays become essential. The 'natural' course of action was to make the trays out of metal - specifically steel - to make the magnets do their job. This worked fine for me as well.

Steel is rigid (duh), it can be cut to extremely precise angles and it can take glue just fine (more on that later). But it has its flaws. First and foremost, the availability. I assume few of us have a steel cutter at hand. For 1mm thick steel in "Warhammer-sized" sheets you can either go to your local metalworks, where, depending on people who work there you can get a ridiculously great bargain from the leftovers bin or walk out empty-handed: such small bits are not normally sold and the company might have a minimum order. Alternatively, you can purchase these from dedicated gaming stores, just not a lot of them carry sheet steel for movement trays. And it can be pricey.

On top of that, steel is heavy. It has sharp edges and corners, so filing is necessary to avoid cuts. Learned that the hard way.

An alternative to steel is a substance called ferrous adhesive tape. As the name suggests, it is and adhesive sheet (of various widths) with metal-like capabilities - chiefly magnetism. It's very handy to work with (just cut and stick), it's light (it's essentially fancy plastic) and it's more widely available than proper metal sheets. It's also more expensive, and since it's not at all rigid, you still need some base for your tray to stick the tape to.

I have tried both of the above and neither worked well for me. Long and hard have I resisted the GW Modular Basing Kit before I bought one just of sheer curiosity.

I was pleasantly surprised. The plastic 'bottoms' are very, very strong, 3 mm thick plastic sheets with 20x20 mm grid on one side and 25x25 mm one on the other. And you get two per pack. It's not a great value, to my mind squeezing a third in there wouldn't hurt anyone, but hey, it's GW. You also get the borders, which are sadly a disappointment.

After gluing them to the sheet, they leave very unsightly gaps between the border and the models' bases. It's 2 mm wide per side, meaning your finished tray will be almost half a centimeter too wide. I managed to fix it thusly:

It's just 2 mm thick cardboard, but it does the job nicely. But to make matters worse, the inner edge of the border bits is NOT perfectly perpendicular to the surface - making some sort of filling necessary.

In addition, if you're making a big tray, say twenty models, you need to glue some 0,5 mm of material under it - after adding the borders, the plate doesn't lat flat against the surface.

Not so good now, hm? Bear with me. I think I can convince you how good this product is yet.

First of all, it's very sturdy and lightweight. 'Nuff said. Secondly, and I think here is where this product's hidden strength lies, is its ability to make custom bases for things like war machines, chariots with more than two beasts, giants, the arachnarok and the like. I will be returning to this in the future and I will show you exactly what I mean.

Now, how do I go about making my trays. I do magnetize all my models and to avoid having to stick anything more on the already thick base plate, here is what I did:

I simply drilled through the whole base plate with a 3 mm drill. The plate is 2 mm thick, exactly the height of the magnets I use. To make them align perfectly with the magnets under the bases, I clamped the bases (one at a time) to the tray and carefully marked the spot. To prevent the magnets from falling out of the tray and to give them more material to glue to, I reinforced the tray with a sheet of 0,5 mm polystyrene.

It is a time consuming project at first, but once you get the hang of it, it goes very smoothly. I built the tray above, from cutting the components to painting, in one evening.

That's a wrap. See you on Saturday, when I'll be showing some painted minis!

Saturday, September 10, 2011

Along came an arachnarok

Have you guessed today's sponsor? Of course you did.

The Arachnarok Spider kit is, to my mind, the best product GW has put on the shelves. It is very fun to assemble and paint, it is insanely detailed (and I mean insanely) and it is, well, BIG. I've grown accustomed to big sci-fi models, but fantasy ones of this size are still "new".

I don 't have any WIP shots anymore, but I shall be making another spider in the future and I will document the process. As you can see, I've altered the pose somewhat. What is being proposed by the design doesn't ring well with me - I can't imagine all this huge mass of plastic being held in four tiny places. Hence, the solution:

The eggs in the tree stump in fact conceal a 2,5mm brass rod holding the whole thing much more firmly. I've made a profound use of the airbrush on this little spideress (yes, it's a she!) and i sincerely recommend the model to anybody who wants to start airbrushing as well. You can go as simple (as I did) or as elaborate as you please, the model really offers possibilities for both. Just be careful of some nasty gaps that need to be filled and sanded very, very smoothly. Take your time on them.

 The model is not without its flaws, mind you. The carapace can't be properly glued, filled and sanded before attaching it to the main body. This makes the airbrushing somewhat problematic - you have to mask the body very, very well to avoid surprises. Luckily, you can paint the "flesh" before attaching the main carapace. However, I recommend constructing the two smaller pairs of mandibles and the whole head bit on the body, then filling the gaps (they don't fit as well as you might expect), sanding the joints smooth and painting the thing. Here good masking is absolutely crucial.
The goblins and the howdah will probably be your most time-consuming step. Not everything fits perfectly here, good glue and some clever clamps are essential. But most of all the sheer mass of detail can be overwhelming. All these twigs, spider web, string, bones, feathers, shield and, of course, skulls will require time to look decent.

The goblins are probably my favorite bits here. All are very characterful, with very natural poses, well-detailed bits and generally are a big step forward. I purposefully left over the shaman and some other crew...
...plus the upgrades like the flinger for a future project. The only thing left to do here are the tiny spiders, which will go on the base to liven it up a little.
 As a final word, thanks to Sigmar of Warhammer Battle Reporters for making the spider a poster child for his latest forum project.

Till next time!

Wednesday, September 7, 2011

Thought I was dead, didya?

Well, I kinda was. I'm not gonna apologize for my absence, I had my reasons for it and that is all I can say. I don't generate much traffic anyway, but still, I hope I haven't disappointed any of my readers.

So, what is new. First of all, my other project, the Greenskin Kultur blog, is as of now terminated. I simply don't have enough material for the orcs alone to constitute a completely separate blog. Ironically enough, my current projects are almost exclusively greenskin in nature. But don't fret, everything will be posted here.

Secondly, I really want to have a second shot at blogging, to be disciplined and dedicated enough to post regularly, if not super-frequently.

So, to kick start things, here is a finished hydra. Only recently I managed to add the last two heads and necks.
Next time you'll see some of my current greenskins projects, enjoy!

Monday, November 15, 2010

WIp Hydra, part six.

Bow to me faithfully!


Aside from the beastmasters, only greenstuffing the necks bit is left to be done.


I know I said three heads previously, but I'm honestly thinking about adding two more, as it in fact should be.


Bits for the beastmasters are in transit and should be arriving shortly. Nothing super-fancy, but still, I have pretty good idea for the handlers.

Until next time.

Tuesday, November 9, 2010

WIp Hydra, part five

Is it perseverance? Is it, perhaps, being fed up with this project and the desire to finish it ASAP? I sincerely do not know. But the fact remains that I'm getting closer and closer to finishing the beast.


I've added all the spikes and ridges it needed, which leaves me with only the necks and heads to do. And of course the beastmasters to goad it, but that's another story.


I'm also going to add something to liven up the base a bit. Dont' know what exactly, but definitely something, the base looks kinda dull and static to me at the moment.


Well, there you have it. The necks bit is assembled, primed and I'm starting to paint it momentarily. I'm very happy to be on the final straight with this project and would love to hear your thoughts.

Until next time.