Monday, November 7, 2011

Rebasing the arachnarok, part three - water pool and more details

Welcome!

The rebasing project is going more smoothly than I'd imagined and this is the penultimate update on it. Remember the details I posted last week? Here they are 'applied':


They of course needed to blend into the base more smoothly, but that was minor work in comparison with the whole project. In addition, I was happy to see the pool apparently didn't need more than one or two layers of Still Water to look decent.

I'm thinking about adding some orange clump foliage to the base in very small pieces, to represent fallen leaves and dry scatter.If I manage to get some that is cheap I'll definitely give it a go.

In the meantime, thanks for looking and see you on Wednesday.

Friday, November 4, 2011

Product review - Vallejo Still Water

It's Friday, Friday, gonna get down on...

Ahem.

Before we start with the review, I'd like to inform my esteemed readers that I'm changing the update schedule for this blog from two updates a week to three. We'll see how it goes, it's just an experiment in motivation and working to deadlines. So, from now on, expect updates on Mondays, Wednesdays and Fridays.

I've decided to review the Vallejo Still Water for two reasons: I haven't seen much buzz about it in the blogosphere (and I just had to risk it when I bought it) and I'm using it right now on my arachnarok base. So here it is.

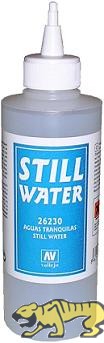
This is our subject. It comes in a 200 ml plastic bottle with an applicator. It ships sealed tight. It's clear, colorless and odorless. From the technical point of view, it's a water-based polyurethane dispersion.

How do you use it?
Quite simple really - you just pour it straight from the bottle onto whatever you want your water to be in. Right? It says so on the bottle, must be true.

It's not.

The hole you get after you cut off the seal is much too big for anything smaller than monster bases. If you want more control over the flow (and you do), apply it with a large sewing needle or a toothpick. The liquid is viscous enough to allow it. I got around the spillages by gluing a syringe needle onto the bottle and it worked perfectly. So far so good.

How exactly does it work?
Firstly, what is very tempting about this product is its simplicity. It's a one-part dispersion, whereas other model water products are mostly two-part resins. Moreover, it says on the bottle that this product "extends and levels by itself". What could be better, right?

Wrong.

While it does level, it does not extend; it's not insulation foam. Quite the contrary, it actually contracts like holy hell, which is the major disadvantage of this product. After it dries, what you get is like a U-shaped basin with recessed center. This, however, is actually an advantage in my book. Look at this picture:
The 'rim' of the pool has already dried and it's crystal clear. Its level is higher than the wet, milky center due to the Still Water's extreme surface tension. Now, when I said "advantage", I meant that when you pour it all over, you instantly get the 'rims' of your water area defined and you're very unlikely to spill it where you don't want it.

And what do you do about the basin shape? Simple - pour another layer! By using multiple thin layers you will eventually get the desired depth in your water.

Secondly, remember to use it after you have varnished your project! Otherwise your water will be matte...  And here is another major caveat - if you want a deep water ('deep' meaning more than just some spill on the floor) you simply have to use multiple layers. Now imagine yourself finishing a project, you have only the water left to do. You'll need, say, five layers of VSW and you'll have to wait at least 12-15 hours between each... frustrating, isn't it? And it becomes 24 hours for larger areas, like the one above (it's about seven by five centimeters, 5mm in depth).

How is it useful?
For making puddles, small pools and such there is no better product within this price range. It's not dirt cheap, but in comparison with other water products it has one of the best price-to-quantity relation.

Also, if you're feeling adventurous, VSW can be used as the ultimate gloss varnish (if a very thick one). You can also try it when making things like drool, slime and such - it can be tinted with pigments or paint.

It will not work when you want flowing or choppy water. "Still" is the keyword here. However, it does not dry to a perfectly still, glass-like surface, it retains some very minute 'waves', making the water look more realistic.

Also, when poured onto a perfectly flat and level, non-porous surface like glass pane or a floor tile, it can be peeled off and cut when dry. I've never found any reason to use it like so, but it sure does have potential. Model window panes, maybe?

So, to sum up:

PROS:
  • Non-toxic, odorless, water-soluble and perfectly removable from clothes and such when still wet;
  • Decent price;
  • Ease of use;
  • Can be tinted with your usual miniature paint;
  • Can be drilled;
  • You get a lot of it in the bottle (but you also need a lot);
  • It doesn't 'go bad', I've had my bottle for at least three years now and it still works perfectly.
CONS:
  • Extreme shrinkage, you'll need multiple coats to get your water looking right;
  • Drying time;
  • It takes a while to get to know exactly how it behaves;
  • You can't model splashes and such with it, nor any sort of flow;
  • Sort of 'amateur' product - there are better ones out there, more expensive and more difficult to use, but ultimately yielding better results.
 On a final note, keep it out of direct sunlight. I lent mine to a friend who didn't and it turned milky in the bottle. It's not ruined like I'd feared it was, but it takes longer to become transparent on the model. Just a word of warning.

All in all, I don't discourage anyone from getting a go with the Vallejo Still Water. It's not perfect and if you are serious about your water projects, get a two-part clear resin or something by Woodland Scenics. If, however, you are like the most of us and use water areas sparingly on your bases, this is the product for you. VSW falls into the category of "might always come in handy".

Thanks for reading and see you Monday. Have a great weekend everybody!

Wednesday, November 2, 2011

Rebasing the arachnarok, part two - base details

Welcome to the second installment of my spider rebasing project. Today, I'll show you some details I'm adding to the base.

...like such. All of these are form wood elf plastic kits. After reading their newest fable, I thought it would be a nice idea to include some rune stones and the like in my army if it was going to be forest-themed. If ALL forests in the Old World are, supposedly, connected, it would be a nice hat tip to this.

Next, the brass etch fern fronds.

Difficult to work with, flimsy and delicate, but after putting them on the base you can hopefully see they look great. They will also be used on my next project, already in the works. If you give them a go, remember to varnish them and touch them as little as possible.

And lastly...
Cat tails! Nothing in my mind says "water" more than water vegetation. These were easy to make from a paper clip and some putty. Undercoat, paint, varnish, done.

Next time I'll be showing you how exactly have I put these on the base.

Saturday, October 29, 2011

Musings of a hobbyist - episode one

Welcome on a great, warm fall Saturday morning. Today I'm attempting something new. Click on the link, hear me out (it takes about 40 minutes) and that's it.

Musings of a hobbyist - episode one

As I promised, the links:

Micromark's seam scraper

Stahly's Tale of Painters

Feedback is much, much appreciated!

Wednesday, October 26, 2011

Rebasing the arachnarok, part one

Hello and welcome!

After doing my article on custom bases and building one for my giant, I haven't been able to shake the thought of rebasing my arachnarok spider as well. When bases of this size are hollow they are bound to be wobbly and very prone to warping. Besides, I knew I could make a base more in keeping with the rest of my army.

Here are some pictures of how I've done so far.

First of all, the milky effect on water will of course be gone by the time it dries, it just takes an awful lot of time. Secondly, this is what I like to call a 'flat' base, meaning all of the materials you simply glue on, like flock or static grass, are in place, but nothing that physically sticks out has been added yet. In this case, I mean fern, pieces of fallen trees, mushrooms and the like. I will most likely also add the odd goblin or some bones; bases of this size need very much material to liven them up.
In my opinion, water is always a nice touch to any large base, also because you don't see water effects on bases very often. Water is hard to do properly (I can only use the Still Water, and it's not very good as well) so few people try it. My pool will be much deeper than it is now, I just have to wait for the previous layer of Still Water to fully dry before adding the next one. It will take a good while, bearing in mind I like to be on the safe side and wait about 24 hours between each layer.

In the meantime, I'm working on other things for the base, like the ferns. I have a sheet of photo-etched ones that I have learned to work with, but once I'm out, I'll buy laser-cut paper ones. The photo-etched ones are ridiculously fragile and working with them taught me whole new depths of the meaning of patience.


I have no idea when I will be finished with this project, I can't even give you folks an estimate, mainly due to the Still Water drying, but after the night goblins it's nice to lay back with a 'relaxed' project like this one. I shall of course document my progress.

Until next time.

P.S.: A hat tip to Stahly of Stahly's Tale of Painters for mentioning my Liquid Green Stuff review in his list of, and I quote: "the best posts from our friends and fellow bloggers from the Tale of Painters Blog Network." Thanks you, my good sir.

Sunday, October 23, 2011

Night goblin battle standard

First of all, please apologize my not posting yesterday. I was preoccupied to say the least.

Secondly, as promised, the night goblin BSB. Brave little big boss waving a big flag.

It's a mini form Battle for Skull Pass, only I don't know which one of the goblin characters it's supposed to represent. I never got the BFSP set, I only managed to get hold of a couple of minis. Well, more than a couple...
The banner is from the multi-part night goblin set and I like it very much. It's tattered, shoddy and perfect for greenskins. Ingame it will represent the Bad Moon Banner of course.

And my favorite piece, the squig. This is the bot that sets an otherwise not very imposing fellow as a character. I love how the squig's skin is stretched by its owner not-so-gentle grip. I've never bought the idea of red squigs; as cave-dwellers I imagine them to be very light-skinned, almost albino. If I ever do a squig herd for the army (and I want to very much), that's how they shall be painted.

That's a wrap folks. See you on Wednesday.

Wednesday, October 19, 2011

Finally finished night goblins

They are DONE! Done, done, done!

 Full unit of forty little buggers, with a BSB. He needs some touching up still, but that's nothing compared to the unit itself.
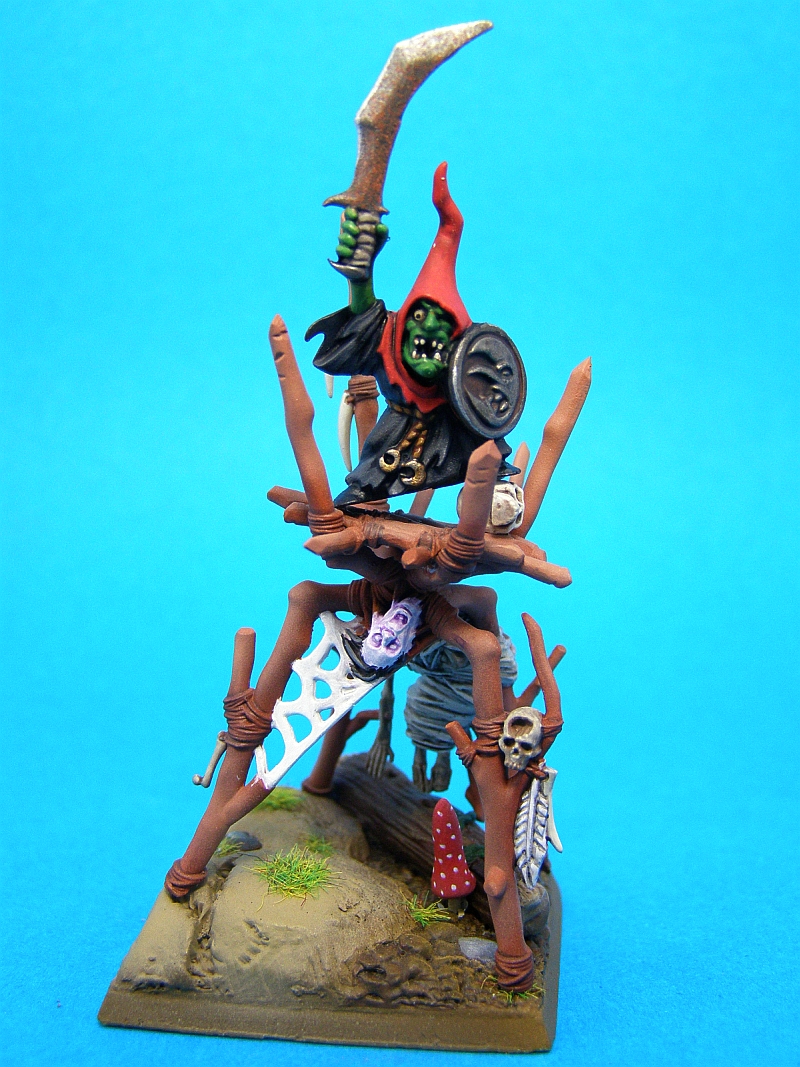
 That's not him, that's a filler. I liked the arachnarok howdah so much I had to include it somewhere. Two unit fillers are perhaps too much, but what can I do when I like some pieces so much?
 And of course the netters. Brilliant idea and decent miniatures to boot.
I still need to add the fanatics, but that's for another time. Right now I'd rather finish the BSB and focus on another project that has nothing to do with night goblins.